
Mercury Ship in a Bottle: 1 2 3 Next>>
Mercury Ship in a Bottle by Daniel Siemens, Page 1
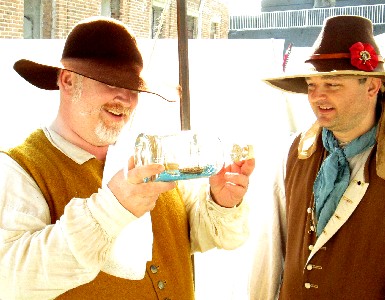
Photo: MIssion's Camera
Mission with William And HisMercury in a Bottle
One of the wonderful things about the web is how it connects people. I would probably have never gotten into pirate re-enacting if it weren't for the people I met at the Pyracy Pub forums. Likewise, I would never have met the capta- er, quarter master of the Mercury crew William Pace aka Brand aka Red Wake had it not been for the same. And I would never have met Daniel Siemens, who scratch builds ships in bottles.
There is probably no better reenactment leader than one who gives their crew guidance without being an autocrat, who encourages the crew members to do the best they can without pigeon-holing them and who inspires those around him to work towards improving their impression without imposing onerous rules upon them. William Pace is all of that and I wanted to show my appreciation to him.
I sometimes give stuffed bears dressed in the garb which those people wear at pirate events to people who have helped me refine my surgeon's impression in one way or another. I thought about giving one to William, but I wanted something different and tailor-made for him. He was one of the first people who invited me to be a part of a pirate crew, one of the first few people who welcomed me at my first event (Fort Zachary Taylor in 2007) and the one who first noticed that (as he put it) "Just when everything on the forum has settled down, you come back in an stir things up." In short, he is just the sort of leader I like. But I am gushing.
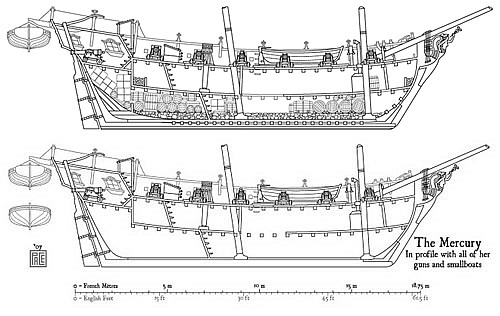
Artist: William Pace - Mercury Cutaway Draught Showing Decks and Organization
Daniel Siemens showed up on the Pyracy Pub in February of 2013, posting images of his sailing ships in a bottle. Color me intrigued. The whole idea of building a ship in a bottle is sort of an engineering feat requiring patience, fine motor skills and neat tricks. This appealed to me. Looking at Daniel's models, it occurred to me that this would be the perfect gift for William, our Mercury crew leader (if not our captain.) So I asked Daniel if he could build our crew's ship the Mercury in a bottle in early 2012.
The Mercury is a thing of beauty to William. He created a full set of blue prints (called 'draughts' in the period lingo) which he printed out of fine parchment and sold for a very reasonable price to anyone interested. He has lovingly refined it's design several times over the years. Daniel got copies of the draughts and used them to practice his art for me.
Building the Mercury Hull
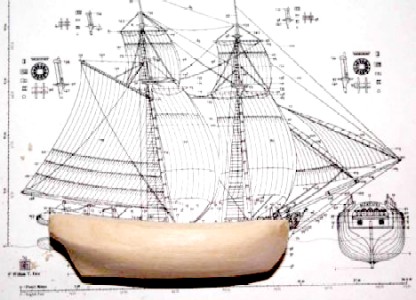
Photo: Daniel Siemens - The Body of the Mercury on the Draught
Daniel began the body of the ship with a block of wood. Since he is the artist, I'm going to let him explain most of the technical details. (Thanks ever so much for Daniel for taking the time to write down how this ship was built.)
"I carved the hull out of a solid piece of bass wood. My method is to use an optical measuring instrument for near precise measurements. (Also known as eye-balling it.) With ships this small, it's hard to get exact measurements. My general rule is if it looks right it probably is. I held up each piece of the ship to the plans to get a pretty good idea on size."
After the body of the ship was sanded, the wood details were added. Daniel: "I planked the ship using nail polish and wood stain. I first stained the ship to get that nice gold wood color and then went over it with the nail polish. After a couple coats of polish I cut the lines for the planking with a razor blade and stained the ship again. The stain seeps into the cuts and stains the wood under the nail polish. The nail polish keeps the rest of the wood from staining. This creates sharp thin lines for the planking."
 Photo: Daniel Siemens - Side View of The Planking |
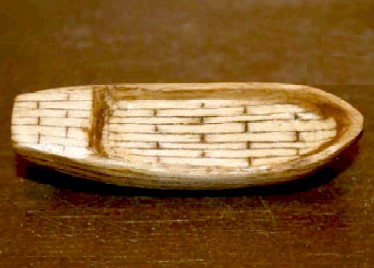 Photo: Daniel Siemens -Top View of The Planking |
The next step was the addition of sealer to the bottom of the ship. Daniel explains, "I painted the bottom white to represent the sealant used in the 18th century ships. It was a mixture of whale oil rosin and brimstone."
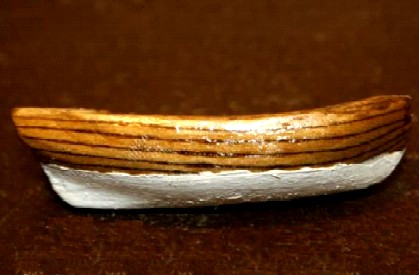
Photo: Daniel Siemens - Coating the Bottom with Whale Oil Rosin & Brimstone
"This keeps the wood from rotting after long exposure to water. This will be under the sea but I like including it. I figured the Mercury crew may not be able to afford the copper plating so I went with the cheaper boiled whale fat and tar."
Daniel asked me if the Mercury would have had copper plating. Knowing William's detailed drawings, I said I thought William would have mentioned copper plating on the draughts if the Mercury had had it. Daniel replied that he had "made an educated guess and went with the white. The copper wasn't used very heavily until the 1800's so I assumed this was the more likely."
This was an interesting lesson for me; I was familiar with caulking the joints of ships with oak and hemp, but not with coating with whale oil rosin and brimstone. I am forever learning new things.
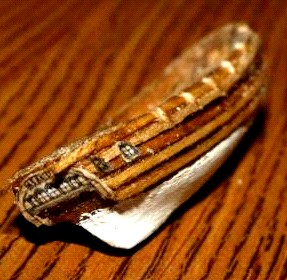
Photo: Daniel Siemens -The Windows in the Back & Side
Daniel asked me about the color scheme of the ship; I didn't know. The only person who would know was William, but we had to be circumspect about asking him or he might suspect something. So Daniel put a general question about a color scheme on the Pyracy Pub which was never answered. Having no useful input, he decided to put a darker stain on the channels.
The next step involved adding the channels, windows and gun ports, which were cut out of the hull. Daniel: "The channels are made from bass wood cut to shape and stained. I find it's easier to cut them a bit thick and sand them down once they are glued on. The smaller the piece, the harder it is to handle. I had to get real creative with the windows. My goal was to add as much detail as I could and I knew I couldn't paint them that small. I let my printer do the job for me. I printed another copy of the plans, cut out the window and glued it into place." In this way Daniel created individual windows and even put the name on the back of the ship.
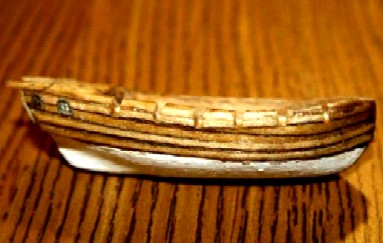 Photo: Daniel Siemens - Side View of Work Done in this Step |
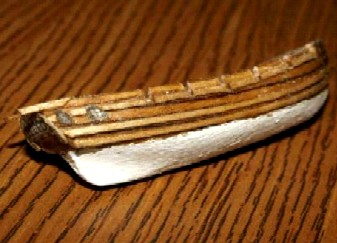 Photo: Daniel Siemens -Angled View of the Windows |
Daniel is something of a perfectionist. As he told me, "I have an obsession for detail that probably needs clinical attention but for now I'm having too much fun."
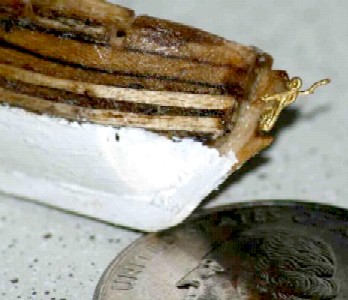
Photo: Daniel Siemens - Lady Mercury, The Ship's Figurehead
He went on to detail, "I had to do some research to figure out the figure head. I think Lady Mercury is important to this ship and had to be included. She is the patron of seafarers and thieves and also known for her speed. The ship being named Mercury is very fitting." Me, being ship's surgeon, I had always thought we had named after the cure of the pox. This is also very fitting, but that's another story...
Daniel continues, "She holds the Caduceus in her left hand a symbol of being a guide to the dead. The ships we encounter will need her."
"I did a good bit of research to find a way to include the figure head and found a french ship in bottle builder with an incredible technique for making little men on ships. He used wire to make the shape and then painted over liberally letting the paint fill in the gaps. Honestly if you haven't seen the work of Michel Bardet you have not seen ship in bottle building."
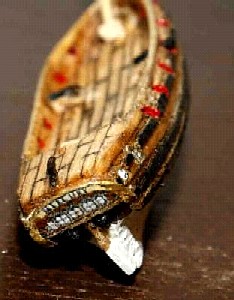
Photo: Daniel -The Windows Re-done.
Daniel then glued the the bow to the deck of the ship and tied down to the keel in the same way that it was done on real ships.
He noted, "This is important because the secret to ship in bottle building is the rigging. The bow has to be solid and hold the weight of the masts."
He also painted the ship because he wanted the details of the ship to pop.
"I put a lot of detail in so I want to find ways to make sure it's noticed. Contrast is a great way to do that. I painted the channels black to contrast those against the hull. The idea for the red port holes comes from a common paint scheme for the USS Syren. I liked the subtle accent of red which brought out the ports."
In addition, he added "the deck furniture", including the tiller and a couple cannons. He decided to add color to the windows in the back, replacing his first version. "I then touched it up once it was glued on. It's hard to see but the stern chasers are included just below the transom [board in the back of the ship with the windows in it]."
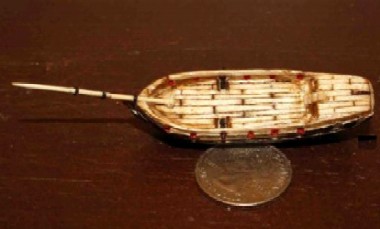 Photo: Daniel Siemens - Mercury Hull with Red Paint and Deck Details |
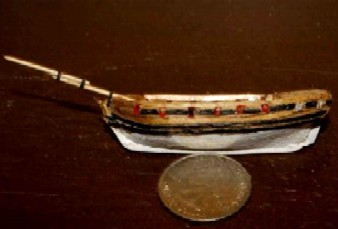 Photo: Daniel Siemens - Mercury With Red Paint Details. |

Photo: Daniel -The Mercury With a Row of Cannons and Hatches, Side View
Of course a couple of cannons isn't nearly enough; the Mercury is a pirate ship, after all. As Daniel reported right after installing the cannons you see in the surrounding images, "I didn't really realize how formidable this ship looked until I got a row of the cannons in. For being a small sloop she's got some power." No doubt this is just as William designed her.
Regarding cannon construction, Daniel noted that "The barrels are made of bamboo skewers passed through a draw plate until they reach the right size. This keeps the size consistent. They are
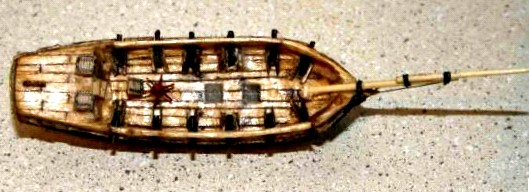
Photo: Daniel -The Mercury with Cannons, Top View
glued in with a couple small blocks on either side to represent the gun carriages.' He also explained, "I just about lost my mind doing them." It makes you appreciate how painstaking this work really is.
"The cannons are where I use another trick of ship in bottle building and let the eye fill in the detail. At first glance they look like cannons on carriages. This is because the mind recognizes what it's supposed to be and fills in the detail. Only by looking closer do you realize they are two blocks glued next to a barrel."
"The
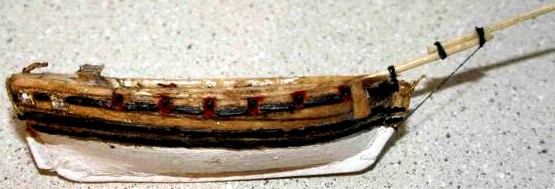
Photo: Daniel -The Mercury With Cannons and Hatches, Starboard Side View
hatches were made in the same way as the windows. I cut out that section of the plans, stained it, and glued it down. The stairs are made of folded paper also stained and glued down."
With the cannons done, he added more hatches and the capstan with bars. "I thought about not including the bars but they were on the plans and I though they added a nice touch. The bars are made of wire glued onto the capstan and painted. I also painted gold around the windows. The paint was kind of thick and came out looking like window sills."
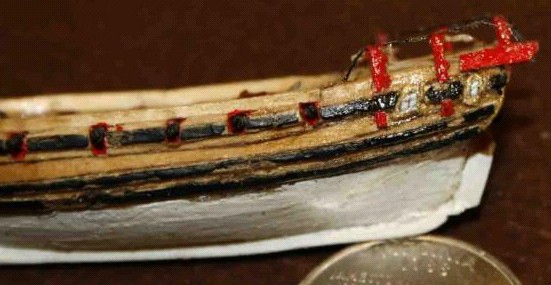
Photo: Daniel -The Mercury Railings, Starboard Side View
"I went on to the railings on the stern. I used matchstick wood as it is easy to carve into thin strips. I capped it off with thread. The ends stick out and are actually davits [amrs mounted on the deck for raising and lowering things from the water] on the plans that would hold the Gullah Launch or the boat being towed behind it in this model's case.
"When I asked about the color scheme for the Mercury William mentioned red. I realized I didn't have enough red on this ship and decided to paint the railings red." With that, the majority of the hull construction was complete.
 Photo: Daniel Siemens - Mercury with Railings and Davits - Top View |
 Photo: Daniel Siemens - Aft View |
Mercury Ship in a Bottle: 1 2 3 Next>>
Main Page • Tools & Procedures • Miscellanea • About the Author • Facebook Page
All original content copyright M. Kehoe • 2003-