Skeleton Tree Atrium Menu: Main Skeleton Tree Prop
The Skeleton Tree Prop
Long ago and far away, back in my HEDZ prop daze, I had had an idea for making a person who had been turned into a tree. I took some photos of myself posed for the tree idea and never went much beyond that. In the junkyard of discarded ideas lay the foundation for this prop... It was my contribution to the 2007 Wyandotte Jaycees haunted house.
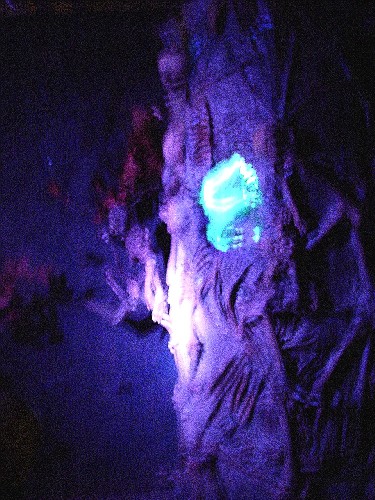
 The Skeleton Tree As It Appears When Blurry and in Black Light |
The Tree in the Daylight |

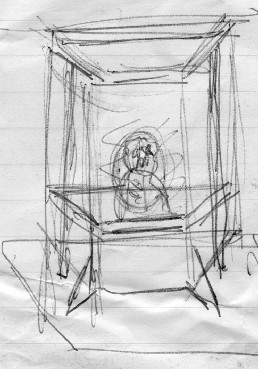
The Initial Sketch of the Skeleton Tree
The Skeleton Tree's Frame
The tree itself arose from the 'human turned into a tree' concept married to another idea - 'avoid doing
something difficult or complex'. I completley failed to stick to that particular mandate.
With my idea in mind, I created a sketch of the frame (which can be seen at left). This sketch was not to scale (obviously).
I then my crappy sketch and built the frame using it, several 2x4s and a table saw. This was then chicken-wired to give it a platform to build upon so that I could attach bones. (These were those Bag o' Bones things you find during Halloween. I always wondered what those were good for.) I attached the foam bones using screws and wire. It sounds sort of simple in explaination, but it took many, many hours to actually get to this point.
The Initial Sketch of the Skeleton Tree
Several days were spent attaching bones. This was the key
to the whole idea, after all.
I had to try and make sure to stick the bones to the 2x4 frame or they didn't wind up being very secure. As a result, the bones wound up networking around the tree, usually with skulls or pelvic bone pieces at each network hub.
I stumbled across the idea of stringing the foam bones together with thin wires (much to my fingers' detriment) and created strange, stacked rows and columns of bones like the one seen in the center of the photo at left. These actually wound up looking rather neat when the black light was placed inside the tree.
For fun, I have included several detail shots of the bone networks below. (The more bones I attached, the weirder my ideas for bone combinations became.)
Bone Detail of a 'Tree Branch' |
The Flying Hands Bone |
A Traffic Jam of Bones on the Tree |
Because this prop had already taken so much time, not to mention room, I decided fairly early in the process to make the tree "bark" simple. I had originally planned to use spray foam to make columns in the bark like you have probably noticed that some of those grand old trees have (those of you who notice such things will have, anyhow.) My desire to make this simple, cheaper and more like a scary tree led me to skip this idea, however. A house on a street near mine had two large Sycamores and I loved the scaly, diseased look of the bark. It's also fairly smooth, which lent itself to paper mache. When in doubt (and under time constraints), stick to the basics.
As it happened, we had a decent storm in the neighborhood and a large Sycamore branch wound up on the sidewalk. I decided that must be providence, so I claimed the branch for use in my haunt (as explained on the Skeleton Tree Atrium page) and cut off a portion of it to put on this tree (picture above, far left.) Below are some shots of the paper mache tree as seen from the left and right side.
Paper Mache on the Left Side of the Skeleton-Tree |
Paper Mache on the Reft Side |
The Skeleton Tree in Light Gray
The most challenging part of the job was the first
The Skeleton Tree in Camo Paint
coat of paint (believe it or not). I had to decide just what I was going for
here. Because I had put the bones on first, there were holes in the paper
mache where I tried to avoid covering up the bones. I filled many of the
gaping holes with paper mache made with paper towels because it gave me
better texture and greater control of the process. Still, there were holes
and places where the bones had mache on them, so painting was a pain. The
first coat was a light grey (seen at left). The second coat was a
free-for-all of several browns, greys and black (seen at right). This was
supposed to be the final coat of paint. Note: supposed to be...I didn't like it.
It didn't look "tree-like" to me. So I bought some light and medium brown spray
paints and misted the thing for a browner look. The final tree is shown below,
from the left, front and center views. In the center view, you can see the prop
inside the tree covered in day-glow green spider web (you have to look closely).
A black light is mounted inside to make the "heart" of the tree glow. The prop
is also covered with blacklight sensitive makeup to make it more visible.
Final Paint - Left Side of Tree |
Final Paint - Front of Tree |
Final Paint - Right Side of Tree |
The final touch was the addition of branches to the top of the tree. The tree looks odd standing alone because the lighting is so good. Once inside the haunted house, the top was far less apparent and the tree looked more trunk-like. The branches were sort of pruned to look like fingers reaching out to the patrons. I don't know how well this will translate, but I trust that if it isn't consciously noticed in the house, it may register subconsciously. (You never know.)
I also stuck Jack the monkey from last year's house on the Sycamore branch because he fit there so well. The lighting in the room focuses on the monkey (more or less) so that the worker can hide on the other side of the tree.
The Finished Tree- Front |
Jack the Monkey on a Branch of the Tree |
The Finished Tree - Back |
